man choking

What to Do When Someone Chokes: How to Respond during Emergency

Choking can happen when you least expect it, turning a normal moment into a scary emergency. Whether it occurs during a meal or while someone is simply enjoying a snack, a blocked airway is a serious situation needing swift action. Understanding how to recognize and respond to choking is crucial for anyone.

Swiftly identifying someone who is choking might be challenging, especially in a busy environment. Recognizing the signs early can make a significant difference in effectively helping the person. Knowing what to do when someone chokes can mean the difference between a quick recovery and a more serious incident.

Learning the steps to assist choking individuals empowers you to act confidently and calmly during emergencies. This guide will provide you with important information on identifying choking and provide practical steps for both adults and children. Being prepared can make all the difference, and it starts with understanding these life-saving techniques.

Recognizing the Signs of Choking

Recognizing the signs of choking is critical for providing timely help. When someone is choking, their airway is blocked, preventing them from breathing. This situation requires quick identification to ensure proper assistance can be given before it escalates.

Here are common signs that indicate someone is choking:

1. Inability to Speak or Breathe: When someone is choking, they won’t be able to talk or breathe properly and may exhibit visible distress.

2. Coughing or Gagging: If the airway is partially blocked, the person may cough forcefully to try and dislodge the object. However, if the cough is weak or non-existent, this is a sign of a more serious obstruction.

3. Clutching the Throat: This is a universal sign of choking. If you see someone with their hands around their throat, it’s likely they need immediate help.

4. Change in Skin Color: A choking person may have blue or pale skin, particularly around the face and lips. This shows a lack of oxygen when the airway is completely blocked.

5. Panic Signs or Loss of Consciousness: Look for signs of panic or if the person stops responding entirely, indicating a critical lack of oxygen.

Being alert to these signs can help you respond quickly and appropriately, increasing the chances of a positive outcome.

Immediate Steps to Take When Someone Chokes

When you spot these signs, it’s essential to act without delay. Knowing the immediate steps to take can help you relieve the choking safely and efficiently. Your quick intervention could potentially save a life.

Follow these steps to assist someone who is choking:

1. Stay Calm and Call for Help: Keep yourself composed. If the person cannot clear the blockage quickly, call emergency services right away.

2. Encourage Coughing: If the airway is partially blocked, encourage the person to cough forcefully. Sometimes a strong cough is enough to dislodge the object.

3. Perform Back Blows: Stand behind the person, lean them slightly forward, and give up to five sharp blows between their shoulder blades with the heel of your hand.

4. Perform Abdominal Thrusts: As known as the Heimlich maneuver, this involves standing behind the person, wrapping your arms around their waist, and making a fist above their navel. Perform quick, upward thrusts to try and expel the object.

5. Alternate Between Steps: If the obstruction remains, alternate between back blows and abdominal thrusts until the item is dislodged or professional help arrives.

Implementing these steps correctly can dislodge the blocking object and restore normal breathing. This immediate action not only helps in the moment but also instills confidence to face such emergencies effectively.

Techniques for Different Age Groups: Adults and Children

Different age groups require different techniques when dealing with choking. Tailoring your approach based on age ensures that the treatment is both safe and effective.

For Adults:

When assisting an adult, use the standard procedures of back blows and abdominal thrusts, as described earlier. Ensure the person is leaning forward slightly during back blows and provide firm, upward thrusts during abdominal thrusts.

For Children (Over 1 Year Old):

You can use a similar method as adults, but adjust the force used. Use less strength during both back blows and abdominal thrusts. Kneel down to their level to apply the thrusts more effectively.

For Infants (Under 1 Year Old):

Infants require a distinct approach since their bodies are delicate. Here’s how to help an infant:

1. Back Blows: Lay the infant face down on your forearm with their head lower than their body. Support the infant’s head and neck. Deliver up to five gentle blows between their shoulder blades.

2. Chest Thrusts: Turn the infant face-up, keeping their head lower than their chest. Use two fingers to apply up to five quick thrusts on the chest, just below the nipple line.

These techniques focus on weaknesses in the anatomy of each age group, making it easier to release the obstruction safely.

Preparation and Training for Emergency Situations

Being ready for an emergency situation involves more than just understanding techniques. Preparation and hands-on training are key components in ensuring a calm and effective response when needed most.

Here are ways to prepare:

1. First Aid and CPR Training: Enroll yourself in a certified first aid and CPR course. This training provides the knowledge and practice needed to handle choking, cardiac events, and other emergencies.

2. Regular Refreshers: Make a habit of refreshing your skills regularly. Techniques can evolve, and a refresher keeps you up to date.

3. Simulated Drills: Participate in drills that simulate real-life emergencies, enhancing your confidence and capability in crisis situations.

4. Family Preparedness: Educate your family on choking hazards, especially for children, and practice responses together to ensure everyone knows what to do.

5. Equipment Availability: Ensure you have access to necessary emergency equipment, such as a first aid kit and AED, particularly in public places and workplaces.

By engaging in proper preparation and training, you feel more competent to handle emergencies swiftly and effectively, fostering a safer environment for everyone.

Conclusion

Addressing a choking emergency requires a keen eye and quick action. Understanding the unique needs of different age groups, followed by the right techniques, is essential. Preparation amplifies your readiness, as training helps you apply the right steps without hesitation. Being prepared means knowing when and how to act, providing comfort in stressful times.

Join Citywide CPR and gain access to comprehensive training in CPR, AED use, and basic first aid courses. Our programs focus on building your confidence and skills to handle emergencies, ensuring you can make a difference. Take the step to equip yourself with life-saving knowledge today.

CPR

The Lifesaving Power of CPR: Essential Information

CPR, or cardiopulmonary resuscitation, is a critical skill that can make the difference between life and death in emergencies. Designed to keep oxygen-rich blood flowing to the brain and vital organs, CPR helps maintain circulation until professional medical help arrives. It provides an immediate response in situations like cardiac arrest, where every second counts.

Understanding the importance of CPR is the first step in appreciating its role in saving lives. Knowing how and when to perform CPR ensures that you are ready to act responsibly and effectively. Being equipped with these skills allows individuals to make a significant impact on the survival and recovery of someone in need.

Anyone can learn CPR, and by doing so, you become a valuable part of the safety net for your community. The ability to confidently provide CPR can transform a bystander into a hero, making it an indispensable skill. This article will guide you through understanding and applying CPR, highlighting its essential role in emergency care.

Understanding CPR and Its Importance

CPR stands for cardiopulmonary resuscitation. This emergency procedure combines chest compressions with artificial ventilation to maintain circulation and breathing in a person whose heart has stopped functioning properly. CPR is crucial during cardiac arrest situations, where the heart suddenly stops beating, because it maintains blood flow to vital organs until professional help arrives.

The importance of CPR cannot be overstated. It provides a chance for survival by keeping the person’s blood flowing and giving vital organs the oxygen they need. Without immediate CPR, brain damage can occur within minutes due to lack of oxygen, leading to potentially irreversible damage or death.

Here’s why knowing CPR is essential:

1. Saves Lives: CPR doubles or triples a person’s chance of survival after cardiac arrest. Quick action can make all the difference.

2. Prevents Brain Damage: By ensuring continual oxygen supply, CPR decreases the likelihood of severe brain injury.

3. Immediate Help: CPR can be performed by anyone trained in the technique, allowing immediate assistance before paramedics arrive.

Learning CPR transforms ordinary individuals into lifesavers. This crucial skill empowers you to respond effectively in emergencies, providing a critical support that bridges the time gap before emergency medical services take over.

Immediate Steps Before Starting CPR

Before you initiate CPR, ensure the area is safe for both the rescuer and the victim. This step prevents further harm and allows you to focus on providing aid effectively and calmly. Ensuring safety is a fundamental component in any emergency response situation.

Follow these steps immediately before performing CPR to assess the situation accurately:

1. Check Responsiveness: Gently shake the person and ask loudly, “Are you okay?” Lack of response indicates the need for further action.

2. Call for Emergency Help: Dial 911 or instruct someone nearby to call if you are not alone. Access to professional medical aid is crucial.

3. Open the Airway: Carefully tilt the person’s head back slightly to open the airway. Look, listen, and feel for normal breathing for no more than 10 seconds. If the person is not breathing or only gasping, it’s time to start CPR.

4. Position Properly: Place the person flat on their back on a firm surface to facilitate effective chest compressions and rescue breathing.

By following these preliminary actions, you ensure a systematic approach, setting the stage for successful CPR application. These steps ensure safety and readiness, allowing you to deliver life-saving aid with confidence and care.

Performing CPR: Key Techniques and Tips

Once you’ve assessed the situation and ensured safety, it’s time to perform CPR. Knowing the proper techniques and tips helps ensure that your efforts are effective and increase the person’s chances of survival.

To perform CPR, follow these key steps:

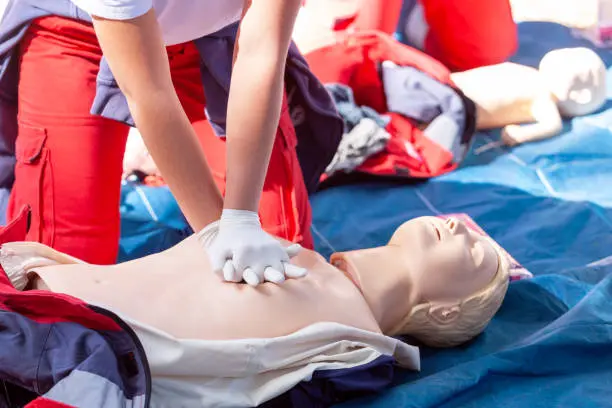
1. Chest Compressions: Position your hands, one on top of the other, at the center of the person’s chest. Use your body weight to compress at least 2 inches deep and at a rate of 100-120 compressions per minute. Allow the chest to rise fully between compressions.

2. Rescue Breaths: If trained in CPR, provide rescue breaths. Tilt the head back slightly, pinch the nose shut, and give two breaths. Make sure the chest rises with each breath. If uncomfortable or untrained in rescue breathing, focus on high-quality chest compressions.

3. Continue the Cycle: Alternate between 30 chest compressions and two rescue breaths. Repeat this cycle until emergency responders arrive or the person shows signs of recovery, such as breathing or moving.

4. Use of AED: If an Automated External Defibrillator (AED) is available, use it as soon as possible. AEDs guide you with clear instructions and are designed for public use.

Consistent execution of these techniques can significantly enhance the chances of saving a life, reinforcing the crucial role each step plays in a successful CPR intervention.

CPR Training and Its Lifesaving Impact

CPR training equips individuals with life-saving skills, transforming them into pivotal responders in emergencies. Understanding and practicing CPR makes a significant contribution to the survival of people experiencing cardiac emergencies.

The impact of CPR training includes:

1. Skill Confidence: Training builds confidence and readiness, ensuring individuals can perform CPR effectively under stress.

2. Community Safety: Widespread CPR knowledge strengthens community safety nets, providing greater assurance that help is available in emergencies.

3. Workplace Preparedness: Employees trained in CPR contribute to a safer working environment, enhancing overall emergency response readiness.

4. Life-Saving Outcomes: Proper CPR training leads to better execution during real emergencies, improving outcomes for victims of cardiac arrest.

Investing in CPR training is crucial for personal and community preparedness. It ensures that more individuals are capable of handling emergency situations with the necessary skills and confidence.

Conclusion

In an emergency, every second counts. Equip yourself with the skills to save lives by enrolling in a CPR training class with Citywide CPR. Our comprehensive programs are tailored to provide you with the knowledge and confidence needed for effective CPR execution. Whether you’re an individual seeking to learn or an employer aiming to train your team, we have flexible options to suit your needs. Let Citywide CPR guide you in making a vital difference when it matters most.

emergency

How to Stay Calm During an Emergency: Key Strategies

Emergencies can happen unexpectedly, leaving you feeling overwhelmed or scared. Whether it’s a medical crisis, a natural disaster, or an unexpected accident, the ability to stay calm is crucial. Keeping your composure helps you think clearly and make better decisions that can help you and others involved.

Controlling stress and anxiety during emergencies is not easy, but understanding how your mind reacts to these situations can help. When we know more about our responses, we can use simple techniques to keep calm and act responsibly. This preparation can make a big difference when you’re faced with a real-life emergency.

Learning first aid and other emergency skills builds confidence. When you know what to do, a lot of the fear can disappear, replaced by a sense of readiness and resilience. By building these skills, you can transform moments of high stress into opportunities to assist and maintain stability, benefiting everyone involved.

Understanding the Psychology of Emergencies

In emergencies, our brains can respond in surprising ways. The adrenaline rush that occurs in high-stress situations prepares your body to either fight or flee. This response dates back to when humans frequently faced physical dangers. However, during modern emergencies, such as accidents or health crises, this instinctual response might hinder clear thinking and quick decision-making.

Understanding how your mind and body might react can help you manage these reactions. Anxiety can cause your mind to race and focus on worst-case scenarios, making it hard to think clearly. You might also experience physical symptoms like a rapid heartbeat or shaky hands, which are normal but can be distracting.

Being aware of these reactions allows you to better control them:

1. Recognize Signs: Identifying when you’re beginning to panic is a vital first step. Recognize the tell-tale signs such as fast breathing, palpitations, or overwhelming fear.

2. Focus on the Present: Try to ground yourself by focusing on your current surroundings or reciting a calming phrase to refocus your thoughts.

3. Acknowledge Emotions: Accept that feeling scared is natural during emergencies. Acknowledging these feelings helps lessen their intensity and regain calm.

By understanding how emergencies impact your mind, you can proactively use these insights to maintain calm and stay efficient in handling the situation.

Practical Techniques to Maintain Calmness

Staying calm during an emergency is a learned skill, strengthened by practicing specific techniques. Knowing and practicing these techniques in advance prepares you better when real emergency situations arise.

Try these practical methods to help manage stress and remain calm:

1. Deep Breathing: Take slow, deep breaths to calm your nervous system. Inhale gently through your nose, hold for a moment, and exhale slowly through your mouth. This process helps reduce anxiety and slows the heart rate.

2. Visualization: Picture a calming scene or remember a safe space that brings you peace. Visualization helps distract your mind temporarily from the stressor, giving you a mental break.

3. Positive Self-Talk: Encourage yourself with reassuring thoughts. Remind yourself that you are prepared and can handle the situation.

4. Practice Grounding Exercises: Focus on immediate physical sensations, like the sensation of feet on the ground or feeling the chair’s support. These techniques can center your attention away from anxiety, pulling you into the present moment.

5. Break Down Tasks: In emergencies, tackle one thing at a time. Breaking tasks into smaller steps can make the situation feel less overwhelming.

Regular practice of these techniques under non-stressful conditions can build muscle memory, making it easier to implement them automatically when faced with real emergencies. This readiness is key to maintaining calm and executing effective action.

The Importance of First Aid Knowledge

Knowing first aid can significantly impact how you handle emergencies. It empowers you to act confidently and provide the necessary help before professionals arrive. This knowledge not only includes the basics of CPR and using an AED, but also understanding how to assist in medical emergencies like choking, bleeding, or sprains.

Learning first aid is a valuable life skill. It allows you to:

1. Assess Situations Quickly: With first aid training, you learn to evaluate an emergency scene to prioritize actions, ensuring safety for everyone involved.

2. Provide Immediate Assistance: You can offer critical first responses, such as applying pressure on a bleeding wound or offering a bandage for a minor cut, minimizing harm.

3. Communicate Clearly with Professionals: First aid training teaches you the right terms and details to relay during emergency calls, which helps first responders prepare effectively.

4. Prevent Serious Injuries: By administering appropriate care quickly, first aid can prevent minor injuries from escalating into severe issues.

Equipped with first aid skills, you can transform an emergency situation into a controlled environment, providing relief and care during those critical initial moments.

Building Confidence Through Regular Training

Confidence in handling emergencies comes with consistent practice and training. Regular exposure to drills and learning environments helps reinforce what you know, making it easier to recall and execute steps when they’re truly needed.

Training builds muscle memory, allowing actions to come naturally. Here are ways training boosts your confidence:

– Frequent Recertification: Regularly updating your certifications ensures you stay informed of the latest techniques and safety protocols.

– Participating in Drills: Simulated emergency drills provide hands-on experience, reducing the likelihood of panic in real situations.

– Collaborative Learning: Group training sessions create opportunities to learn from others, offering varied perspectives and solutions.

By making training a regular part of your routine, you not only refine your skills but also instill a peace of mind, knowing you can act efficiently under stress.

Conclusion

Emergencies require clear thinking and decisive actions. By understanding how to stay calm and equipped with practical skills, you enhance your ability to manage these situations effectively. First aid knowledge and regular training reinforce your readiness, turning fear into competence. Embracing these skills is not just about personal preparedness; it’s about ensuring the well-being of your community.

Empower yourself and others by getting the right training. Connect with Citywide CPR to explore our comprehensive BLS training courses designed to build your confidence and skills in handling emergencies. Whether you’re interested in learning CPR, AED use, or first aid best practices, our courses offer the knowledge and experience you need.

AED

What Are the Benefits of AED in Community Centers?

Community centers are hubs for activity, bringing together people of all ages for events and social gatherings. With so many people using these spaces, it’s vital to ensure that they are equipped to handle medical emergencies effectively. One crucial device that can significantly enhance safety in these settings is the Automated External Defibrillator (AED).

AEDs are designed to help save lives during sudden cardiac arrest by delivering a shock to the heart to restore its natural rhythm. Having an AED readily available in community centers means that help is close at hand, increasing the chances of survival and recovery for anyone experiencing a cardiac emergency.

Placing AEDs in community centers offers a layer of protection and peace of mind for visitors and staff alike. Understanding how these devices work and their role in public safety is key to making community centers more secure places. This article delves into the benefits of having AEDs in these facilities, highlighting their importance and the steps required to establish an effective AED program.

Understanding AEDs and Their Role in Heart Health

AEDs, or Automated External Defibrillators, are portable devices designed to treat sudden cardiac arrest (SCA), which occurs when the heart stops beating abruptly. They deliver an electric shock to restore the heart’s natural rhythm, crucial during the initial minutes of an emergency. This shock can save a life by jumpstarting the heart and maintaining vital organ function until professional medical help arrives.

Heart health is a significant concern, with cardiac arrest affecting hundreds of thousands each year. AEDs play a vital role by providing quick action that can double or triple the survival chances. Unlike heart attacks caused by blocked vessels, cardiac arrest results from an electrical disturbance, making AEDs an essential tool in these cases.

Understanding the operation of AEDs is crucial for their effective use. Here’s how they work:

1. Turn On the Device: AEDs come with easy-to-follow voice prompts that guide users through each step of the process, ensuring accuracy even in high-stress situations.

2. Apply Electrode Pads: Attach the electrode pads to the victim’s bare chest as directed by the device. These pads detect the heart’s rhythm to determine if a shock is necessary.

3. Deliver Shock if Needed: If the AED advises a shock, ensure everyone is clear of the person and press the button to deliver the shock. Afterward, continue CPR if instructed by the AED.

By equipping community centers with AEDs, we increase the likelihood of survival during cardiac events, promoting heart health and wellbeing across communities.

Key Benefits of AEDs in Community Centers

Having AEDs in community centers presents several critical benefits that enhance public safety and preparedness. These devices are accessible to anyone experiencing a cardiac emergency, providing peace of mind to visitors and staff.

Here are the key benefits of placing AEDs in community centers:

1. Rapid Response: AEDs enable fast action in emergencies, delivering a life-saving shock within minutes after cardiac arrest. Immediate access increases survival chances significantly.

2. User-Friendly Design: AEDs are straightforward to use, equipped with step-by-step voice instructions. This design allows even untrained bystanders to assist in a crisis.

3. Boosts Community Safety: Installing AEDs demonstrates a commitment to public health and safety, enhancing trust and security in community environments.

4. Minimizes Response Time: By placing AEDs within easy reach, response times improve, which is crucial in situations where each minute without defibrillation reduces survival chances by 7-10%.

5. Encourages Training and Awareness: Having AEDs available increases community awareness about cardiac arrest and inspires more individuals to seek CPR and AED training.

Community centers become safer and more supportive environments by embedding AEDs into their safety protocols. These benefits highlight the importance of equipping public spaces with the tools needed to handle unexpected cardiac emergencies effectively.

Steps for Implementing AED Programs in Community Centers

Implementing an AED program in community centers requires careful planning and coordination. It ensures that the devices are readily available and that staff and patrons know how to use them effectively.

Here are the steps to establish a successful AED program:

1. Conduct a Needs Assessment: Determine the number of AEDs required based on the size and layout of the community center. Consider high-traffic areas where an AED would be easily accessible.

2. Select Appropriate AED Devices: Choose devices that are user-friendly and reliable. Ensure they meet the necessary safety and regulatory standards.

3. Install AEDs in Strategic Locations: Place AEDs in visible and easily accessible spots. Ensure signage and clear instructions are nearby to guide users in an emergency.

4. Develop a Maintenance Plan: Regularly check and maintain the AED units to ensure they are in working order. This includes replacing batteries and electrode pads as needed.

5. Promote Community Awareness: Inform the community about the availability of AEDs and the importance of using them during cardiac emergencies. Provide informational materials and host awareness events.

Through proper implementation, community centers can ensure their AED programs are effective, offering immediate help to anyone experiencing cardiac arrest within their premises.

Training and Safety: Maximizing AED Effectiveness

Training is a critical component in maximizing the effectiveness of AEDs in community centers. Equipped with proper training, individuals feel confident to act swiftly in emergencies, improving the chances that someone in need receives the help they require.

Consider these key elements of AED training:

– Hands-On Training: Practical experience with AEDs increases confidence and ensures correct use. Training sessions should include CPR instruction, as the two often work together in emergencies.

– Regular Refresher Courses: Ongoing education keeps skills sharp. Periodic refreshers ensure participants remember the steps and procedures.

– Emergency Response Drills: Simulated scenarios help prepare staff and community members for real-life situations, allowing them to practice coordination and quick decision-making.

– Safety Protocols: Teach participants about safety measures, such as clearing the area before delivering a shock and keeping a safe distance.

By focusing on training and safety, community centers can ensure that their AED programs are effective and provide life-saving assistance when needed.

Conclusion

Empowering communities with the right tools and training makes public spaces safer for everyone. Citywide CPR offers AED implementation and training solutions tailored to your community’s needs. Equip your center with the skills and tools to save lives. Contact Citywide CPR today to learn more about our comprehensive AED training programs.

First Aid

First Aid for Severe Bleeding: A Simple Guide

When an accident happens and someone is bleeding badly, quick action is crucial. Severe bleeding can be dangerous because it can lead to losing too much blood very quickly. Knowing how to respond and what steps to take can make a big difference.

Understanding what severe bleeding looks like and the best ways to stop it helps keep everyone safe. First aid knowledge equips people with the confidence to manage these situations calmly and effectively. Having the right skills can prevent complications and even save lives.

This guide offers simple, easy-to-follow steps for handling severe bleeding. Whether at home, work, or play, being prepared and knowing what to do benefits everyone. By learning these important first aid techniques, you’re ready to help when it matters most.

Recognizing Severe Bleeding: Signs and Causes

Severe bleeding, also known as hemorrhaging, requires immediate attention. Recognizing its signs early can save a life. Blood loss can occur from injuries like deep cuts, car accidents, or falls. But what exactly should you look out for?

1. Visible Blood Flow: If blood is spurting or flowing heavily from a wound, it’s a clear sign of severe bleeding. This often indicates damage to large blood vessels.

2. Blood Saturation: When a bandage or cloth becomes soaked through with blood quickly, it means the bleeding is significant.

3. Symptoms of Shock: Watch for pale skin, weakness, rapid breathing, or confusion. These symptoms suggest the body is not getting enough blood.

4. Bleeding in Vomit or Stools: Internal bleeding might not be obvious at first. However, blood in vomit or dark, tarry stools can indicate a serious problem.

Understanding the causes of severe bleeding helps in preventing it. Accidents are common causes, but conditions like hemophilia or certain medications make people more prone to bleeding. By being aware of these signs and causes, you can better assess the situation and act quickly to help.

Immediate Steps to Control Severe Bleeding

Responding swiftly to severe bleeding can prevent complications. Here are the crucial steps to take control of the situation and offer effective first aid:

1. Apply Direct Pressure: Use a clean cloth or bandage to apply firm pressure directly over the wound. This helps slow down or stop the bleeding.

2. Elevate the Wound: If possible, raise the injured area above heart level. Elevating helps reduce blood flow to the wound, aiding in clot formation.

3. Keep the Patient Calm: Reassure the person and encourage them to stay still. Movement can increase blood flow and make the bleeding worse.

4. Bandage the Wound: Once the bleeding is under control, cover the area with a sterile bandage. Avoid removing the initial cloth; add another layer if necessary.

5. Seek Medical Help Quickly: Severe bleeding requires professional attention. Call emergency services as soon as possible while continuing to apply pressure.

These steps are essential for managing severe bleeding before professional help arrives. Understanding how to respond effectively not only provides immediate aid but also prepares you for situations where acting fast makes all the difference.

Essential First Aid Supplies for Bleeding Emergencies

Being ready for emergencies means having the right supplies on hand. A well-stocked first aid kit can make managing severe bleeding much easier and more effective. Here are some key items you should include to handle bleeding emergencies:

1. Sterile Gauze Pads and Bandages: Use these to apply pressure and cover wounds. They help control bleeding and keep the wound clean.

2. Adhesive Bandages: These are useful for smaller cuts and can help secure gauze in place for larger wounds.

3. Antiseptic Wipes: Clean the skin around the wound with antiseptic wipes to prevent infection.

4. Medical Tape: Tape helps keep gauze and bandages secure over wounds, which is important for maintaining pressure.

5. Disposable Gloves: Wearing gloves protects both the helper and the injured person from potential infections.

6. Scissors: Use scissors to cut bandages or tape as needed for the injury.

Ensure that your first aid kit is accessible and items are not expired. Familiarize yourself with the contents, which helps in administering first aid quickly when needed. Regularly check and replenish supplies to maintain readiness for any emergency.

Preventing Complications and When to Seek Medical Help

Taking initial steps for bleeding control is crucial, but knowing when to seek professional medical help is just as important. Some conditions require expert care to avoid worsening the injury or serious complications.

1. Uncontrolled Bleeding: If the bleeding doesn’t stop after applying pressure, it requires medical attention. Continue applying pressure until help arrives.

2. Signs of Shock: If the person becomes dizzy, pale, or confused, these are signs of shock. This means they are not getting enough blood flow and need urgent care.

3. Foreign Objects in the Wound: Do not try to remove objects like glass or metal from a wound. Leave this to healthcare professionals to prevent further harm.

4. Severe Pain or Loss of Function: If the injured person experiences intense pain or cannot move a limb, seek medical help immediately.

5. Unusual Wound Color or Swelling: These could indicate infection or other complications that must be addressed by a doctor.

Acting swiftly and knowing when to escalate to medical services can reduce risks and promote quicker recovery. Understanding these signals ensures you provide effective support in emergencies, paving the way for better outcomes.

Conclusion

Handling emergencies with confidence and competence is key to ensuring safety and health. Understanding how to recognize severe bleeding and taking immediate steps to manage it are crucial skills. Having a well-prepared first aid kit and knowing when to seek additional medical help enhances your ability to care for those in need.

For comprehensive CPR and first aid training and more, Citywide CPR offers tailored programs to equip you with the vital skills and knowledge to respond expertly to emergencies. Investing in proper training not only boosts your confidence but can make a life-saving difference. Explore what Citywide CPR has to offer and take a step towards becoming a capable first responder in your community.

AED

AED Placement: Key Considerations for Schools

Automated External Defibrillators (AEDs) play an important role in increasing survival rates in cardiac emergencies. Schools are places bustling with activity, where having AEDs on-site is crucial for the safety of both students and staff. These devices are designed to be easy to use by anyone, offering crucial help in the event of sudden cardiac arrest.

Proper placement of AEDs within a school is essential to ensure they can be accessed quickly and efficiently when needed. Strategic placement helps in minimizing the time from cardiac arrest to defibrillation, which is vital for increasing the chances of survival. Understanding key considerations for their placement can make a significant difference in emergency preparedness.

Having AEDs readily available is an important step in creating a safe environment in educational settings. Prioritizing AED placement ensures that schools are equipped to respond promptly to heart emergencies, contributing to the well-being of the entire school community.

Understanding the Importance of AEDs in Schools

AEDs, or Automated External Defibrillators, are vital devices that can save lives during sudden cardiac arrests. Schools, as community centers filled with children and adults, benefit greatly from having AEDs readily available. During a cardiac emergency, every second matters, and immediate access to an AED can be a critical difference-maker.

The need for AEDs in schools extends beyond just older staff members or visitors. While rare, young students can also experience heart-related emergencies. These incidents might result from undiagnosed heart conditions or unforeseen accidents during physical activities. The presence of AEDs ensures that schools are prepared for such emergencies, providing peace of mind to students, parents, and educators alike.

Several important reasons underscore the value of having AEDs in schools:

1. Immediate Response: AEDs allow rapid response to cardiac arrests, improving survival chances.

2. Ease of Use: Modern AEDs are user-friendly and often provide prompts, allowing even untrained individuals to operate them effectively.

3. Increased Safety: Placement of AEDs signifies a commitment to a safe and prepared learning environment.

4. Community Trust: Parents and staff feel reassured knowing that the school prioritizes the well-being of everyone on campus.

By understanding why AEDs are essential in schools, administrators can make informed decisions that protect people and strengthen the community’s safety readiness.

Factors to Consider for Optimal AED Placement

Placing AEDs strategically within a school ensures quick access during emergencies. Several factors play a role in determining the best locations for AED devices. The goal is to make AEDs easily accessible to anyone in the building, minimizing the time taken to retrieve them during critical moments.

Consider these important factors when deciding AED placement:

1. High-Traffic Areas: Place AEDs in areas where many people pass through daily, like entrances, hallways, and near gyms. This visibility ensures that someone can quickly access the device during an emergency.

2. Proximity to Sports Facilities: Gyms and sports fields are common sites of activity and potential injuries. Having an AED nearby means responders can act swiftly if an athlete collapses.

3. Accessibility: Ensure AEDs are positioned at a height and location accessible to all, including younger students and individuals with disabilities.

4. Central Location: Aim for central spots to ensure the device is reachable within a few minutes from any classroom or part of the school.

5. Signage and Awareness: Use clear signage to direct people to AED locations. Regular drills and awareness programs can reinforce knowledge of where devices are located.

By considering these factors, schools can enhance their emergency preparedness and make sure that AEDs serve their purpose effectively when needed most.

Training and Preparedness: Ensuring Effective AED Use

Having AEDs in schools is a critical step, but training people to use them effectively is just as important. When staff and students know how to operate an AED, emergency response becomes more efficient and less stressful. Training ensures that the device is used properly, maximizing its life-saving potential.

Key components of AED training include:

1. Basic AED Introduction: Trainees should learn about AED components, such as pads, buttons, and monitor screens. Understanding these elements helps users feel more comfortable with the device.

2. Hands-On Practice: Practicing with real or simulated AEDs gives individuals the confidence to use them in a real situation. Regular drills can reinforce this knowledge.

3. Emergency Protocols: People should know the school’s emergency response plan, including who is responsible for calling emergency services and coordinating roles.

4. Scenario-Based Training: Simulating real-life scenarios ensures that users are prepared for various emergencies, helping them remain calm and efficient under pressure.

School-wide training programs enhance the ability to respond effectively during cardiac emergencies. They empower not just medical staff, but also teachers, students, and other personnel to assist when time is of the essence.

Maintenance and Program Management for School AEDs

Proper maintenance of AEDs is crucial to ensure they function correctly when needed. Regular checks and program management practices help keep the devices ready for any cardiac emergency. Schools should develop a routine maintenance plan that includes checking batteries, pads, and performing device diagnostics.

Essential maintenance tasks involve:

– Regular Checks: Schedule monthly inspections to ensure batteries and pads are up to date. Check the device for any signs of wear or damage.

– Testing Functionality: Conduct regular tests as per the device’s manual to ensure it operates properly. Keep records of these tests for future reference.

– Stocking Supplies: Maintain a stock of spare batteries and pads to prevent any downtime due to supply shortages.

Program management involves keeping an updated list of AED locations, ensuring staff is trained annually, and conducting drills to practice emergency scenarios. Effective management also includes making sure AEDs are accessible while keeping track of device expirations and any software updates.

Conclusion

Installing AEDs in schools is more than a precaution; it is a vital part of ensuring the safety and well-being of everyone on campus. By understanding the importance of AEDs, strategically placing them, and ensuring the school community is well-trained, schools create an environment where they can rapidly respond to cardiac emergencies. Ongoing maintenance and program management further ensure the readiness and functionality of these devices, securing peace of mind for everyone involved.

To enhance the safety and preparedness of your school, consider partnering with Citywide CPR. We provide comprehensive training and maintenance solutions tailored to meet your needs, ensuring your AED training program is effective and reliable. Partner with us to equip your school with the necessary life-saving skills and tools, creating a safer community for all.

CPR Certification

CPR Certification: Why It’s Important for Everyone

CPR, or cardiopulmonary resuscitation, is a life-saving skill everyone should know. Heart emergencies can happen to anyone, anywhere, and knowing CPR can make the difference between life and death. It equips individuals with the confidence to act quickly and effectively during critical moments.

Getting certified in CPR means you learn the right techniques and stay updated on the best practices. This training empowers you to assist not just family and friends, but also strangers in need. By spreading these vital skills, more lives can be saved when every minute counts.

Besides saving lives, CPR certification benefits communities as a whole. As more people get trained, neighborhoods become better prepared for emergencies. This readiness builds a safer environment where everyone feels responsible for one another’s well-being. Learn how to not just react, but to lead when it truly matters.

Understanding CPR: What It Is and How It Works

Cardiopulmonary resuscitation, commonly known as CPR, is a crucial technique that helps maintain blood flow and breathing in a person whose heart has stopped beating. It combines chest compressions with rescue breaths to keep oxygen-rich blood circulating until professional medical help arrives. This process is vital in preventing brain damage and further damage to organs, which can occur within minutes of cardiac arrest.

Chest compressions are a key component of CPR. They involve pushing hard and fast in the center of the person’s chest at a steady rhythm. This action helps push blood through the heart and to other vital organs. Rescue breaths, also part of CPR, involve breathing into the person’s mouth to inflate their lungs and supply necessary oxygen.

Understanding how CPR works and when to use it is essential. Key Steps in CPR include:

1. Assess the Situation: Check if the person is responsive and breathing.

2. Call for Help: Dial emergency services or instruct someone nearby to do so.

3. Start CPR: Begin with chest compressions followed by rescue breaths if trained.

Practicing these steps regularly through certification courses ensures that individuals can act effectively, even in high-stress situations like cardiac emergencies. CPR knowledge can turn bystanders into rescuers, making a life-saving difference.

The Lifesaving Benefits of CPR Certification

Knowing CPR can help save lives, but getting certified ensures that you’re equipped with the latest skills and confidence to act in emergencies. CPR certification teaches proper techniques and helps reduce fear of doing something wrong, which often prevents people from stepping in during a crisis.

One of the most significant benefits of CPR certification is its impact on survival rates. When cardiac arrest occurs, each minute without intervention lowers the chance of survival by 7% to 10%. Trained individuals can provide immediate assistance before emergency services arrive, significantly improving outcomes.

Certified CPR providers learn to recognize signs of cardiac emergencies quickly. These include:

– Sudden collapse or unconsciousness

– No breathing or only gasping

– Absence of a pulse

Understanding these warning signs aids in faster decision-making and interventions, saving precious time when every second is critical.

Certification also prepares individuals to use automated external defibrillators (AEDs). These devices deliver an electric shock to the heart to restore its normal rhythm. Knowing how to use an AED is often part of CPR training, providing an extra tool to save lives.

Overall, CPR certification is an invaluable asset that empowers individuals to become confident first responders. It extends beyond individual benefits, creating safer schools, workplaces, and communities where anyone can contribute to saving a life.

How CPR Training Empowers Communities

CPR training does more than equip individuals with lifesaving skills; it empowers entire communities by creating networks of prepared citizens ready to act in emergencies. As more people in a community become CPR certified, the likelihood of a positive outcome during a cardiac emergency increases substantially.

When residents know CPR, they contribute to a sense of security and reliability within their neighborhoods. Schools with CPR-certified staff can ensure student safety, while workplaces that include CPR training in their health programs create a safer environment for employees. These efforts ultimately build resilient communities capable of handling unexpected emergencies together.

CPR training can also involve:

– Community Workshops: Organize events where local residents can learn CPR basics.

– School Programs: Introduce CPR in school curricula to educate students early.

– Workplace Training: Encourage companies to offer CPR certification to employees.

These initiatives foster collaboration and ensure that CPR skills become a common practice among the populace. The result is a cohesive community equipped with individuals who are confident in providing help when it matters most. Stronger, more compassionate communities emerge as everyone takes part in prioritizing health and safety.

Choosing the Right CPR Certification Program

Selecting the right CPR certification program is crucial to gaining complete and accurate training. With various options available, it’s important to consider factors that will suit your specific needs and ensure you receive high-quality instruction.

Here are key aspects to evaluate when choosing a CPR certification program:

1. Accreditation: Ensure the program is recognized by reputable organizations like the American Heart Association or the Red Cross.

2. Course Content: Check that the course covers essential skills, including chest compressions, rescue breaths, and AED usage.

3. Instructor Expertise: Look for courses taught by experienced professionals who can provide guidance and answer questions.

4. Training Format: Decide between in-person or online courses depending on your learning preference and schedule flexibility.

5. Certification Validity: Know how long the certification lasts before needing renewal, typically every two years.

Citywide CPR offers comprehensive CPR certification programs tailored to different learning styles and requirements, ensuring every participant gains confidence in their skills. Selecting the right course will empower you with the knowledge to take decisive action in emergencies, fostering a safer environment wherever you are.

Conclusion

Understanding the importance of CPR certification and its broader impact on communities highlights why these programs are essential for everyone. By getting trained, individuals not only equip themselves with lifesaving capabilities but also contribute to creating a circle of safety and readiness in their surroundings. Whether at home, in the workplace, or within the wider community, the presence of CPR knowledge acts as a vital safeguard against unforeseen emergencies.

Join Citywide CPR to access top-notch CPR certification training courses that cater to individuals and groups alike. By participating in our programs, you’ll open the door to becoming a well-prepared responder, ready to play an integral role in safeguarding your community and saving lives when needed. Take the first step towards empowerment today with Citywide CPR.

Family Sports

Heart Health Tips for Busy Families

Juggling work, school, and family activities can make it hard to focus on heart health. Yet, it’s crucial to include healthy practices in daily life. Heart health affects everyone in the family, from young children to grandparents. Taking small steps together can lead to big benefits.

Prioritizing habits that support a strong heart doesn’t have to be difficult or time-consuming. Making healthy choices fun and engaging encourages everyone to join in. Whether through delicious meals or active games, heart-smart decisions improve well-being and strengthen family bonds.

This guide will provide you with easy and practical tips to keep your family’s hearts healthy. By incorporating these strategies into daily routines, you can make a lasting impact on your family’s health while enjoying quality time together.

Understanding Family Heart Health: Why It Matters

Heart health is vital for every family member, young and old. Keeping your family’s heart in top shape reduces the risk of heart disease and promotes overall well-being. It’s important to understand why heart health matters, especially for busy families with hectic schedules.

Heart disease is a leading cause of health problems, and it can impact individuals of any age. Teaching kids healthy habits early on sets a strong foundation for a lifetime of good health. For adults, maintaining heart health helps in staying active and energetic to participate in family life.

Children learn by example, and seeing parents make heart-healthy choices encourages them to do the same. This family approach not only helps in preventing heart disease but also strengthens the bond between members.

Engaging the family in heart health discussions helps in recognizing risk factors such as obesity, high blood pressure, and high cholesterol. Understanding these risks paves the way for healthy decisions and fosters a supportive environment that benefits everyone. Families that prioritize heart health enjoy more active, fulfilling lives, reaping the benefits of their shared efforts.

Easy Nutritional Choices for Heart Health

Creating heart-healthy meals doesn’t have to be challenging. With a few simple changes, families can enjoy delicious meals that promote heart wellness. Here are some easy nutritional choices to incorporate into your family’s diet:

1. Choose Whole Grains: Swap white bread and pasta for whole-grain varieties. Whole grains are rich in fiber, which helps maintain a healthy heart.

2. Incorporate Fruits and Vegetables: Make fruits and veggies a staple in meals and snacks. Aim for a rainbow of colors to ensure a range of nutrients.

3. Select Lean Proteins: Opt for lean meats, fish, beans, and legumes. These choices help build strong muscles without excess fat.

4. Limit Sugars and Salt: Cut back on sugary beverages and snacks. Choose herbs and spices over salt to add flavor.

5. Use Healthy Fats: Cook with oils like olive or canola instead of butter. These oils contain beneficial fats that support heart health.

Creating a meal plan that includes these choices helps in maintaining a balanced diet. Mealtime can be a fun experience, encouraging kids to try new foods and recipes. By focusing on heart-friendly foods, families set a path for long-term health and enjoyment.

Fun Family Activities to Boost Cardiovascular Fitness

Getting the family moving is a great way to improve heart health while spending quality time together. Regular physical activity strengthens the heart and builds endurance, offering benefits for all family members. Here are some fun activities that can easily fit into your family’s routine:

1. Outdoor Adventures: Plan weekend hikes or bike rides. Explore local trails, parks, and nature reserves. These adventures provide exercise and opportunities to learn about the environment.

2. Family Sports: Organize a friendly game of soccer, basketball, or frisbee. These sports are excellent for cardio and teamwork skills.

3. Dance Parties: Turn up the music and let everyone show off their best moves. Dancing is a fun way to burn calories and lift everyone’s spirits.

4. Walking Challenges: Set a family goal for the number of steps each day. Use a pedometer or fitness app to track progress and celebrate achievements.

5. Home Workouts: Find an online family-friendly workout video. Exercise from the comfort of your living room at a time that’s convenient for everyone.

Incorporating these activities into your weekly routine encourages a love for movement and helps build lifelong heart-healthy habits.

Managing Stress and Creating Healthy Habits Together

Stress can take a toll on heart health, making it important for families to find ways to relax and create a balanced lifestyle. Managing stress together can improve mood, strengthen relationships, and promote better heart health for the whole family.

Start by setting aside time for relaxation in your daily routine. Practice deep breathing exercises or meditation for a calming effect. Sometimes, a simple family walk after dinner can provide a peaceful end to a busy day.

Encourage open conversations about feelings and stressors. Listening and providing support helps everyone feel valued and understood. Families that communicate regularly often find it easier to manage challenges together.

Creating healthy habits as a unit involves setting realistic goals. Make bedtime routines, screen-time limits, and regular family meals a priority. Celebrating achievements, no matter how small, reinforces the value of these routines and keeps the family motivated.

Lastly, remember to include plenty of laughter and fun in daily life. Positive interactions and joyful experiences contribute to reducing stress and building strong family bonds that support heart health.

Conclusion

Caring for your family’s heart health can be a rewarding journey filled with learning and growth. By focusing on nutrition, fun activities, and stress management, families can develop habits that support a healthy heart and a joyful life together. These efforts build a strong foundation for everyone to thrive, creating a happier and healthier family environment.

Don’t wait to start on your path to better heart health. Whether you’re looking to enhance your family’s knowledge on emergencies or improve first aid practices, Citywide CPR is here to assist you with comprehensive programs and resources tailored to your needs. Join us in creating a heart-healthy future for your family. Sign up for CPR and first aid training today.

CPR

CPR for Different Age Groups Tips for Optimizing Survival

CPR, short for cardiopulmonary resuscitation, is a crucial life-saving technique used in emergencies where someone’s breathing or heartbeat has stopped. While basic CPR principles apply to everyone, the method varies significantly based on the age of the person in need. Understanding these differences ensures that you apply the right techniques for the right age group, boosting the chances of a successful outcome.

Each age group presents unique challenges, whether dealing with the fragility of an infant or the specific health concerns of the elderly. Knowing how to adapt CPR for different ages helps responders act confidently and effectively in critical situations. By learning the proper techniques, you can make a vital difference at the moment it matters most.

In this blog, we’ll explore how CPR differs across various age groups. This knowledge empowers you to react in emergencies with the skills needed to provide appropriate care. So, let’s dive into the essential changes in CPR methods to ensure everyone can offer the best support in critical moments.

CPR Techniques for Infants: Special Considerations

Performing CPR on infants requires special care and technique due to their delicate bodies. The goal is to restore breathing and circulation without causing harm. Here are the key steps to remember when administering CPR to an infant:

1. Check Responsiveness: Gently tap the baby’s foot or shoulder and call out to see if there is any response. If there is no reaction, call for emergency help immediately.

2. Position the Infant: Place the baby on a firm, flat surface like a table or the floor. Ensure their head is slightly tilted back to open the airway.

3. Perform 30 Chest Compressions: Use two fingers placed just below the nipple line. Press down about 1.5 inches into the chest at a rate of 100-120 compressions per minute.

4. Give 2 Rescue Breaths: Ensure the baby’s mouth and nose are covered with your mouth. Deliver gentle puffs of air, watching for the chest to rise. Each breath should take about one second.

5. Continue the Cycle: Continue alternating between 30 compressions and two breaths until help arrives or the baby shows signs of life.

These steps are vital for providing effective CPR to infants, ensuring you maintain their safety and improve their chances of recovery in an emergency.

CPR for Children: What You Need to Know

When it comes to children, CPR techniques differ slightly from those used on infants and adults. Children, typically ages 1 to 8, require adaptations to account for their growth and anatomy. Here’s what you need to know about performing CPR on children:

1. Check for Responsiveness and Breathing: Tap on the child’s shoulder and shout to check responsiveness. Look for normal breathing, not just occasional gasps.

2. Call for Help: Have someone call 911 or do it yourself if you’re alone, applying CPR immediately after.

3. Perform Chest Compressions: Use one or two hands, depending on the size of the child. Compress the center of the chest by about 2 inches. Aim for a rate of 100-120 compressions per minute.

4. Give Rescue Breaths: Tilt the child’s head back slightly, pinch the nose closed, and place your mouth over theirs to give two breaths. Ensure each breath raises the chest.

5. Repeat the Cycle: Continue with 30 compressions followed by two breaths. Do not stop unless the child shows signs of life or emergency personnel take over.

These steps ensure comprehensive and effective CPR for children, maximizing the potential for positive outcomes during emergencies. Understanding these differences prepares you to offer appropriate care to young ones in need.

CPR Guidelines for Adults: Key Differences

Performing CPR on adults involves specific guidelines to ensure effectiveness and safety. Understanding these differences is essential for providing the correct care during emergencies. Adult CPR generally follows straightforward steps intended to restore heart and lung function efficiently.

1. Check Responsiveness: Shake the person’s shoulder gently and ask loudly if they’re okay. If there’s no response, call 911 immediately and get an Automated External Defibrillator (AED) if available.

2. Chest Compressions: Position your hands, one on top of the other, in the center of the chest. Press hard and fast, aiming for a depth of about 2 inches and a rate of 100-120 compressions per minute. Let the chest fully recoil between compressions.

3. Rescue Breaths: Ensure the airway is open by tilting the head back slightly. Pinch the nose and cover the person’s mouth with yours, providing two breaths after every 30 compressions. Watch for chest rise with each breath.

4. Use an AED: Once it arrives, turn on the AED and follow the visual and audio prompts. It guides you through the process and delivers shocks if necessary.

Adult CPR emphasizes quick, powerful compressions and effective use of an AED. Knowing how these steps work significantly boosts the chances of reviving someone experiencing cardiac arrest.

Understanding CPR for the Elderly: Adapting with Care

CPR for the elderly often requires additional considerations due to potential health conditions and fragility. These adjustments ensure the procedure is both safe and effective, without causing harm to the individual.

1. Gentle Handling: Be mindful of fragile bones and skin when positioning for CPR. Position your hands carefully and apply consistent, firm pressure without being too forceful.

2. Chest Compressions: As with adults, compress the chest about 2 inches deep. However, be attentive to resistance that might indicate weakened bones or frailty.

3. Monitor Breathing and Pulse: Elderly individuals may have subtle signs of breathing or pulse. Check these carefully before proceeding with rescue breaths.

4. Consider Medical Conditions: Be aware of potential medical devices like pacemakers or other health conditions that could affect CPR application.

Adapting CPR techniques for the elderly is vital in preventing additional injuries while aiming to restore vital functions. This careful approach better accommodates their specific health needs, ensuring that assistance is as protective as it is life-saving.

Conclusion

CPR is a life-saving skill that varies across age groups. Understanding the nuances of each ensures readiness and effectiveness when emergencies strike. From infants to the elderly, each group demands specific attention to detail and technique to maximize the chances of a successful outcome. Whether compressing gently for a baby or using precise pressure for adults, knowing these differences helps meet the unique needs of each person.

Citywide CPR is committed to equipping you with the knowledge and skills needed to perform CPR effectively across all age groups. Our CPR certification courses online provide comprehensive instruction tailored to these specific needs, ensuring you’re prepared to act with confidence in any emergency. Join us in learning these vital skills and become a crucial support system for those in need.

first aid

Home First Aid Guide: Effective Care for Common Injuries

No one plans for accidents to happen at home, but they do occur more often than we’d like. From accidental cuts and scrapes to unexpected slips and falls, minor injuries are a part of life. Knowing how to respond quickly and effectively with proper first aid can make a big difference in recovery and comfort.

Every household should have essential supplies ready to handle these everyday mishaps. Being prepared with the right items ensures that you can promptly address injuries and prevent them from becoming worse. Once equipped, understanding how to treat common home injuries can turn you into the go-to person during emergencies.

In this blog, we’ll dive into practical first aid techniques that everyone should know. These skills are invaluable, offering peace of mind and assurance that you’ll be prepared to handle minor injuries safely. Whether it’s dealing with a simple scrape or managing an unexpected allergic reaction, being ready can help keep your household safe and healthy.

Essential First Aid Supplies for Home Use

Having a well-stocked first aid kit at home is crucial for addressing common injuries promptly. Knowing what to include in your kit helps ensure you’re prepared for most minor emergencies. Here are the essential items every home first aid kit should contain:

– Adhesive Bandages: Various sizes of bandages help cover cuts and scrapes, preventing infection and promoting healing.

– Sterile Gauze and Tape: These are useful for larger wounds that require covering and protection.

– Antiseptic Wipes: They clean wounds effectively, reducing the risk of infections.

– Antibiotic Ointment: Applying it to cuts and scrapes helps prevent infection and encourage healing.

– Tweezers: Useful for removing splinters or small debris from wounds.

– Scissors: Handy for emergency trimming tape, gauze, or clothes.

– Instant Cold Pack: It helps reduce swelling and pain from injuries.

– Elastic Bandage: Useful for supporting sprains and strains.

– Pain Relievers: Over-the-counter medications can alleviate pain and reduce inflammation.

Regularly check the kit to replace used or expired items. Personalize it with additional supplies you may specifically need, like allergy medications or epi-pens. Having these supplies ready gives you confidence and control over most home mishaps.

Treating Cuts, Scrapes, and Burns

Minor cuts, scrapes, and burns are part of everyday life, but knowing how to treat them can prevent complications and speed up recovery. With proper care, you can easily manage these injuries at home.

Cuts and Scrapes:

1. Clean the Area: Use lukewarm water to rinse the wound, removing dirt and debris.

2. Apply Antiseptic: Use wipes or solutions to disinfect the area and kill germs.

3. Protect the Wound: Cover it with a bandage or sterile gauze to prevent dirt and bacteria from entering.

4. Monitor for Infection: Watch for signs like redness, swelling, or pus, which require professional attention.

Burns:

1. Cool the Burn: Run cool (not cold) water over the burn for several minutes. Avoid ice, as it can cause more damage.

2. Cover the Burn: Use a sterile, non-stick bandage to protect the area.

3. Avoid Ointments: Do not apply grease or oily substances which can hold heat in the skin.

Pay close attention to healing cuts, scrapes, and burns. If there are any unusual changes or increased pain, seek medical advice. Knowing how to effectively address these injuries ensures quicker recovery and helps prevent future problems.

Managing Sprains, Strains, and Fractures

Sprains, strains, and fractures are common injuries, especially during physical activities or accidents. Knowing how to handle these injuries at home can prevent further damage and aid recovery.

Sprains and Strains:

1. Rest: Avoid using the injured area to prevent aggravating the injury.

2. Ice: Apply an ice pack wrapped in a cloth for 15-20 minutes every few hours to reduce swelling.

3. Compression: Use an elastic bandage to wrap the area, reducing swelling and providing support.

4. Elevation: Keep the injured part elevated above heart level to minimize swelling.

Fractures:

– Immobilize: Keep the injured limb as still as possible to avoid further injury.

– Support: Use a splint or soft material to support the area until professional help arrives.

– Seek Medical Attention: Contact medical services for further evaluation and treatment.

Monitor the injury closely. Persistent pain, swelling, or inability to move indicates the need for medical evaluation. Knowing these steps ensures you effectively manage sprains, strains, and fractures while waiting for professional care.

Handling Breathing Emergencies and Allergic Reactions

Breathing emergencies and allergic reactions can occur unexpectedly. Quick and appropriate actions are important to protect health and ensure safety.

Breathing Emergencies:

1. Stay Calm: Encourage the person to stay relaxed to avoid panic, which can worsen the situation.

2. Assess the Situation: Check for any visible obstructions and ensure the airway remains open.

3. Assist with Breathing: If trained, administer rescue breaths. Call 911 immediately for help.

Allergic Reactions:

– Recognize Symptoms: Look for signs like swelling, itching, rashes, and difficulty breathing.

– Administer Medication: Use an epinephrine injector if available and trained to do so.

– Seek Immediate Help: Call emergency services, especially if breathing difficulty persists.

Timely action and awareness are crucial in managing these emergencies. Understanding these steps can make a life-saving difference in situations where quick decision-making is needed.

Conclusion

Being prepared to handle common home injuries provides confidence and peace of mind. Understanding and applying first aid principles empowers you to manage emergencies effectively, providing critical care when it’s needed most. Whether dealing with minor cuts or serious fractures, knowing the right steps ensures timely intervention, aiding in quicker recovery and reducing complications.

At Citywide CPR, we recognize the importance of being prepared for emergencies. Consider enrolling in one of our CPR and first aid courses to enhance your skills and readiness. With our comprehensive training programs, you can confidently handle unexpected situations, ensuring the safety of your family and loved ones. Join us to learn life-saving techniques and become an essential resource in your household.